Welcome to the dark and mystical world of Diablo 4, where the Necromancer's arsenal is ever-evolving and the quest for power is eternal. In this deep dive, we explore the Bone Spirit skill—a force that has risen from the depths to become a cornerstone of the Necromancer's might. Join us as we unravel the mysteries of this formidable ability and its recent transformative updates.
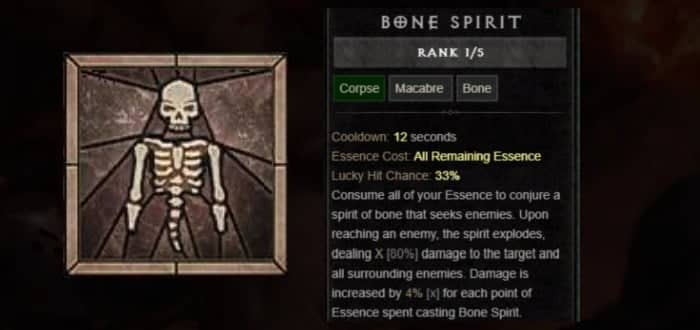
Bone Spirit
Bone Spirit has ascended to new heights of power with pivotal updates that redefine its role in combat:
1. Cooldown Reduction: The skill now has a cooldown reduction mechanism. If Bone Spirit critically strikes, its cooldown is reduced by 7 seconds. This effect can only happen once per cast, allowing for more frequent skill use.
2. Necromancer Invigoration: This tempering recipe for Necromancers enhances gameplay by restoring primary resources. Casting macabre skills restores 15-21 primary resources, which means that after every cast, you can quickly regain resources during that 1-second cooldown time.
Maximum Damage Explained
To achieve the maximum damage with the Bone Spirit skill, you'll want to focus on three main components:
1. Essence Spending: Spend 275 Essence to reach a guaranteed overpower Critical Strike. The base Critical Strike Chance is 70.2%, which is increased by an additional 25% when using Bone Spirit.
2. Critical Strike Chance: The combination of Bone Spirit and Bone Storm skills, along with the use of corpses, pushes the Critical Strike Chance to 125%, ensuring every hit is critical.
3. Fortify & Corpse Utilization: Use skills like Blood Mist and Reap to create corpses, which not only fortify you but also increase your damage output with Bone Spirit. The Corpse Tendrils skill further amplifies this effect.
Here's a breakdown of the damage calculation:
• Base Critical Strike Chance (CSC): 70.2%
• Bonus CSC from Bone Spirit: 25%
• Additional CSC from Bone Storm and Corpses: 29.8% (to reach 125%)
• Total CSC: 125% (guaranteed critical hits)
Damage Calculation Demystified
The formula for calculating the damage inflicted by a critical hit with Bone Spirit is as follows:
$$ \text{Damage} = \text{Base Damage} \times (1 + \text{Critical Strike Multiplier}) \times \text{Other Modifiers} $$
During the Pit Boss Fight, use Spirit Step to dodge attacks and chain your skills effectively to maintain high damage output and survivability. The key is to keep the rhythm of dodging and attacking, utilizing the cooldown reduction and resource management to continuously deal damage.
Cooldown Breakpoint
Achieving a low cooldown for your skills is crucial in maximizing the efficiency of your build for a Necromancer in Diablo 4. The 8-second cooldown breakpoint is significant because it allows you to effectively chain your skills. When you land a critical hit, the cooldown reduction helps you to quickly reset your skills, which is essential for maintaining high damage output and resource management.
Here's a simplified explanation of the cooldown mechanics:
- Base Cooldown: The initial cooldown duration of your skill.
- Cooldown Reduction (CDR): The percentage by which your cooldown is reduced, allowing for faster reuse of the skill.
- Critical Hits: Some skills or gear may further reduce cooldowns when you land a critical hit.
To reach the desired cooldown breakpoint, you'll need to focus on gear and skill choices that offer cooldown reduction. Additionally, masterworking your gear to enhance these properties can significantly improve your performance. For example, if a skill has a base cooldown of 20 seconds and you have a 50% CDR from gear and passives, the new cooldown would be 10 seconds. Landing a critical hit that reduces the cooldown by 1 second would then bring it down to 9 seconds, which is close to your 8-second target.
Bone Spirit Skill Changes
Core Skill Changes:
• Bone Spirit: Now a core skill consumes more essence when combined with Unliving Energy and Imperfectly Balanced but deals 15% more damage.
Skill Synergies and Strategy:
• Enhanced Reap & Acolyte’s Reap: These skills are used to generate corpses, which are crucial for fortification and the Overpower multiplier.
• Corpse Tendrils & Hewed Flesh: These skills help create additional corpses, which are not directly interacted with, contrary to Grim Harvest and Fueled by Death.
• Blood Mist: Allocating one point here for corpse creation, despite not interacting with them directly.
Skill Point Allocation:
• Death’s Embrace: Three points for damage reduction.
• Amplify Damage: Four points to increase overall damage output.
• Abhorrent Decrepify: Used for lucky hits to reduce Bone Storm cooldown.
Advanced Build Adjustments:
• Dreadful Bone Spirit: Swap to this later for an essence bonus.
• Serration: One point increases Critical Strike Chance, useful if you're not already at 100% bonus Spirit Critical Strike.
• Rapid Ossification: Three points for cooldown reduction on Bone Storm.
• Memento Mori & Inspiring Leader: For damage reduction and bonus Critical Strike Chance from Bone Storm.
• Ossified Essence: The final touch for the build, likely enhancing essence-related mechanics.
Gear, Aspects, and Tempering
Core Gear and Amplification
• Banished Lord’s Talisman: Central to the build, enhancing Bone Spirit as a core skill or acting as a double cooldown reduction amulet.
• Blood Moon Breaches: Utilized for life damage reduction from cursed enemies and a 70% increase in overpowered damage.
• Adventurer’s Gloves of Serration: Boosts core skills, thereby increasing Bone Spirit's effectiveness. Focus on tempering for Critical Strike Damage and Chance.
Essence Management and Resource Restoration
• Chest Piece: Enhanced essence regeneration, significantly increased by the Loop of Torment ring, boosting essence per second from 22.5 to as much as 52.5.
• Macabre Skills: Ensure barrier generation for each enemy damaged by Bone Storm, enhancing Bone Spirit's utility.
Helmet and Boots for Defensive and Mobility Enhancements
• Helmet (Archon Helm of Hardened Bones): Prioritize essence per second and cooldown reduction, with potential for maximum life or total armor tempering.
• Boots (Archon Greaves of Metamorphosis): Increase ranks in Bone Spirit and leverage the Unstoppable Metamorphosis aspect for enhanced mobility.
Offensive Gear for Cooldown and Damage Optimization
• Cooldown Reduction: Target double cooldown reduction to achieve the desired 8-second cooldown for continuous skill casting.
• Corpse Talismans: Optimize for super bonus damage and an increased Bone Spirit explosion size, creating a more impactful battlefield presence.
Weapon Tempering and Aspect Synergies
• Bone Storm Duration: Aim for a significant bonus to Bone Storm duration through weapon tempering.
• Critical Strike Damage: Essential for maximizing damage output, complemented by tempering for Overpower Damage.
• Bone Spirit Critical Strike Chance: Increase by 25% to ensure bonus essence on hit and guaranteed Critical Strikes.
Build Focus and Critical Strike Efficiency
• Speed Farming Optimization: Designed for efficient resource collection in the Pin, best suited for tiers 70s to 80s.
• Critical Strikes: Boost Essence Regeneration by 155% with bone skills, with the Shattered Spirit's Aspect as an alternative for essence on bone splinter explosion.
Cooldown Management Strategies
• Tempering: Focus on Bone SP Cooldown Reduction by 15%, which works in tandem with bone critical strike damage to maintain skill readiness.
Rapid Ossification Trick
The Rapid Ossification Trick is a cooldown reduction (CDR) strategy for the Bone Storm skill in a game. Here's how it works:
• Essence Spending: When you spend essence on casting skills, it triggers a CDR mechanism.
• Cooldown Reduction: As you spend essence, the cooldown of Bone Storm decreases, allowing you to cast it more frequently.
• Enhanced Staying Power: By enhancing the staying power of Bone Storm, you ensure that it remains active for longer periods, which synergizes well with the CDR from essence spending.
• Lucky Hits: Landing lucky hits with certain skills can further reduce cooldowns, keeping your Bone Storm running continuously.
During the dungeon gameplay, this means that as you cast Bone Spirit and other skills that consume essence, the cooldown for Bone Storm is reduced. This allows you to have Bone Storm up again by the time its duration ends, creating a cycle of continuous damage output.
Bonus Cooldown
The Choker of Grasping Veins is key to this strategy. It significantly reduces the cooldown of your skills, particularly the Bone Spirit. With the cooldown reduction from the amulet, you effectively have a zero cooldown for your skills, allowing for continuous casting.This build works exceptionally well with aspects that return essence upon explosions, enhancing the no-cooldown effect.
Skill Optimization:
• Bone Spirit Efficiency: The cooldown can be reduced to as low as 5.76 seconds, enabling you to cast Bone Spirit more frequently.
• Essence Restoration Tempering: Instead of tempering for cooldown reduction, focus on tempering that increases essence restoration from Bone Spirit. This ensures a consistent resource supply to maintain skill casting.
Build Adjustments:
• Tempering Choices: Forego the typical dual Bone Spirit cooldown temper rings. Opt for rings that boost essence restoration for Bone Spirit, allowing for more frequent skill usage.
Book of the Dead
• Skeleton Warrior Sacrifice: Utilizing the Book of the Dead, your sacrificed skeleton warriors contribute to resistance stats.
• Resistance Conversion: With the right configuration on the paragon board, this resistance can translate into an additional 5% Critical Strike Chance.
• Critical Strike Optimization: In your current setup, this bonus would elevate your Critical Strike Chance to 78.2%. Coupled with the Bone Storm's effects, you effectively reach a 100% Critical Strike Chance.
• Build Refinement: With a full Critical Strike Chance, you have the option to remove the Swelling Curse from your build, as it becomes redundant.